
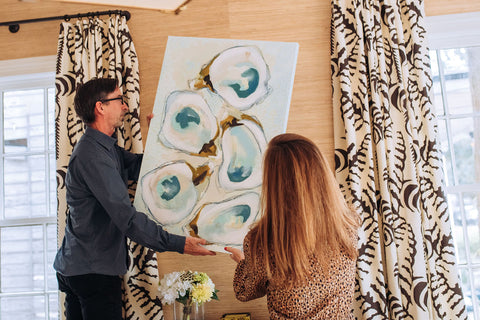
Last week I was lucky enough to spend a few hours with an art installation dream team at Crosby Designs’ gorgeous showroom in Jacksonville’s historic Riverside neighborhood. Now I’m biased as Jacksonville is my adopted hometown but we’re talking wealth of fine art knowledge and talent. First I’ll introduce the crew and then get right to the nitty gritty of how you can install art in your home without stress and the results will be museum quality.
Chloe Wood, Well + Wonder’s newest Artist who will be releasing all of the work featured here on March 9th- mark your calendars!
Jennie Hugo and Mary Martha Waterworth, Crosby Designs for Hugo’s Interiors. These two happen to be married to very talented artists and have a keen eye for incorporating original art into their design plans.
Brian Shrum, The Cummer Museum of Art & Gardens. Brian installs exhibitions at the Museum and has installed works by Monet, Matisse and most recently ancient Egyptian artifacts from the Brooklyn Museum.
Andrea Bottin, Andrea Bottin Photography. Andrea worked her magic to capture our morning at Crosby Designs, hope you enjoy the visual references!

Once you have a work of art in your home, where do you begin?? Start by looking at the back of the piece.
- Your artwork will likely either have a pair of D rings (named for their D shape) or a wire screwed into the back of the frame or canvas.
- D rings are the preferred method for hanging heavier pieces. Measuring to hang with D rings requires more precision but your art will hang sturdier and WILL NOT shift (invest in a level, you will not regret it).
- Wire works great for lighter pieces and hanging is certainly easier! Truth be told, only a handful pieces in my home are hung with D rings. Plenty of larger pieces are hung with wire and yes I do walk around straightening them from time to time.
- Smaller framed pieces hung on wire can often be secured by applying a small amount of Handitak on the back side of each corner.
- If your work of art is REALLY heavy you may see a French cleat system on the back of the frame.Don’t fret, these offer great support and flexibility to move a piece left or right given their horizontal cut edge design.

Next up, make sure you have appropriate hardware.
- Museums like The Cummer often prefer hooks with two or three thinner nails like these.Thinner, more solid nails go in easier and multiple nails offer more support. Follow the weight rules on the hardware package.
- When hanging with wire a rule of thumb is to hammer in two points of support whenever a piece is over 30lbs.If a piece is lighter than 30lbs but you want to prevent shifting go for two points of support.
- If you have plaster walls like me and are thrilled when you get one nail in let alone two, go with that!Just be prepared to straighten the piece every once in a while.

Have plaster walls, charge your drill and read on.
- Plaster walls are in a league of their own.You will likely need a drill to secure a nail or screw appropriately.
- Chances are you know your walls better than anyone.If a screw feels like it is under stress, invest in a wall anchor to secure the screw.
- If you’ve had it with plaster walls…take a look at these photos below and consider installing a picture rail with hanging system like the one in the Crosby Designs showroom.Picture rails are brilliant if you plan to move art around in your home often. Brian recommends Griplock.


Now for the fun part, choosing the perfect placement in your home.
- Select height as it relates to your line of vision and establish a center line.Center lines will vary from person to person. When in doubt go with a 60in center line from the floor. The Cummer recently moved from installing with a 58in center line to a 60in center line and the difference is more noticeable than you’d think!
- If you have enough wall space, double or triple hang art when you can. Just leave visual room if you have a piece of furniture below.
- The rule of thumb is to space art two inches apart on a gallery wall. If a work of art is framed with a mat, you may want to mix it up and use the width of the mat as a guide to space pieces and set up a rhythm.
- If art is partially blocked by a lamp that’s ok! Art is an element of your room and you want it to connect visually to the composition of the room. When laying out exhibitions, Brian designs a wall to be seen as a whole rather than piece by piece.
- If you have a pair, consider hanging them symmetrically like in Chloe's photo below.Asymmetry adds interest to a room too, you can balance a wall by factoring in a variety of shapes and sizes!

Cheers to stress free installation!! If we haven’t covered your questions, please reach out anytime (emily@wellandwondercollective.com). We’re here to help and would love to see photos of your install projects!
Xx, Emily


